

Overview
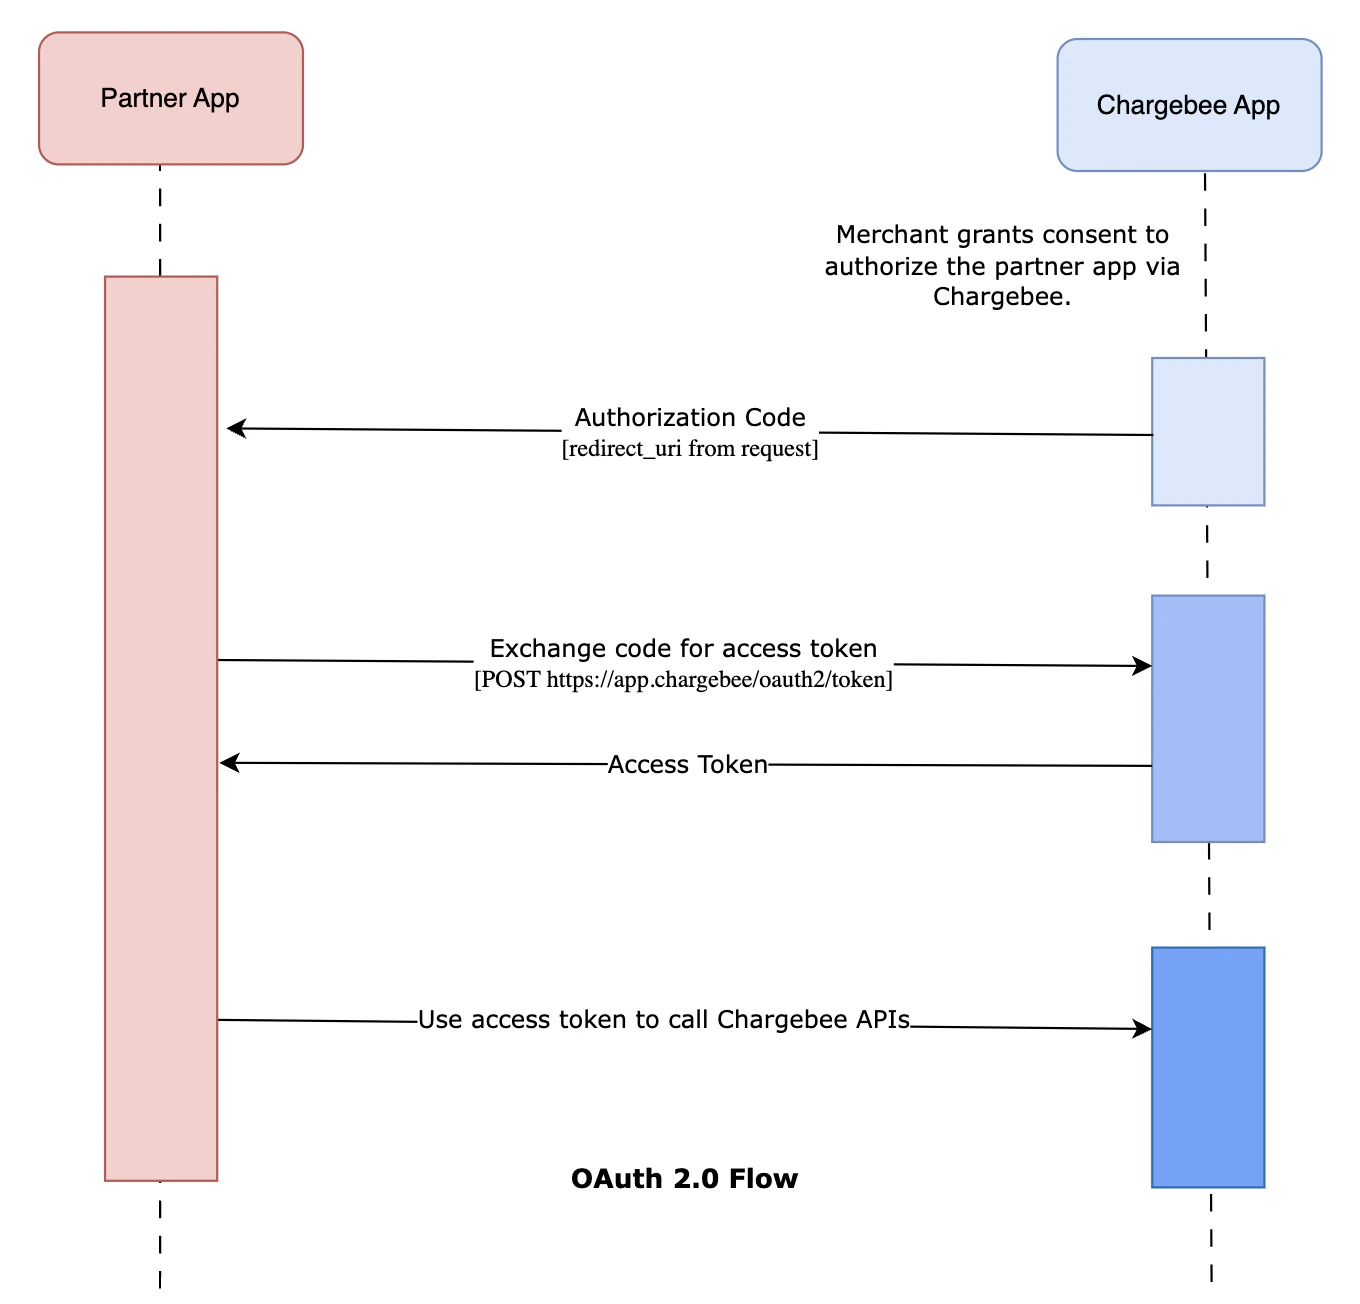
Partner adapter apps must be authorized by Chargebee using the OAuth 2.0 Authorization. This allows your app to securely call Chargebee APIs (such as webhook callbacks) on behalf of a merchant after consent is given. This guide explains how Chargebee initiates the flow, how your adapter should implement Oauth flows, and best practices for secure implementation.OAuth 2.0 Flow Overview
The OAuth 2.0 authorization flow consists of these main steps:- User Authorization: Redirect users to Chargebee’s authorization server
- User Consent: Users review and grant permission to your application
- Authorization Code: Chargebee returns a temporary authorization code
- Token Exchange: Exchange the code for access and refresh tokens
- API Access: Use the access token to make authenticated API calls
- Token Refresh: Use refresh tokens to obtain new access tokens when needed
Prerequisites
Before implementing OAuth 2.0, ensure you have:- A Chargebee partner sandbox account.
- Client ID and Client Secret from Chargebee.
- Understanding of your application’s required scopes.
- HTTPS-enabled application (required for production).
Supported Grant Types
Chargebee OAuth 2.0 currently supports the following grant types:-
Authorization Code Flow
Recommended for web-based applications and server-side implementations that require secure, user-authorized access. -
Refresh Token Flow
Used to obtain a new access token without requiring user reauthorization, after the original access token expires.
Step 1: App Registration by Chargebee
- Once you have submitted your app following the onboarding process, Our team will review your application and the client credentials will be shared with you securely.
Note: The credential provisioning process typically takes 2–3 business days. Please ensure your application details are accurate to help us process your request faster.
Step 2: Merchant Authorization via Chargebee UI
When a Chargebee merchant connects your app:- Chargebee displays a consent screen to the merchant.
- After approval, Chargebee redirects the user to your registered
redirect_uriwith:- An
authorization_code - An optional
stateparameter for CSRF protection
- An
Step 3: Exchange Authorization Code for Tokens
Once your adapter app receives thecode parameter from Chargebee via the redirect URI, you must exchange it for an access_token and refresh_token using the token endpoint.
Token Request (cURL)
Sample response
Step 4: Make Authorized API Calls to Chargebee
Once the access token is available, your adapter app can call Chargebee APIs (such as posting document status updates).Example API Call (cURL)
Access Token Claims
The access token issued by Chargebee is a JWT (JSON Web Token). It contains encoded claims that provide metadata about the authorization context. To extract the Chargebee domain, which is required to construct the correct API URL:- Decode the JWT payload (the second part of the JWT:
header.payload.signature) - Extract the
domainclaim from the decoded payload - Use the value of
domainto construct the API base URL
Example JWT Payload
Step 5: Refresh Access Tokens
Access tokens are short-lived. When expired, use the refresh_token to obtain a new access token without requiring the merchant to authorize again.Refresh Token Request
Security Best Practices
- Always use HTTPS for all OAuth communications in production environments.
- Store client secrets securely using environment variables or secure key management systems.
- Implement proper token validation and verification on every request.
- Never expose access tokens in client-side code or public repositories.
- Implement proper error handling for token-related operations.
- Regularly rotate client secrets as part of your security practices.